Getting Started
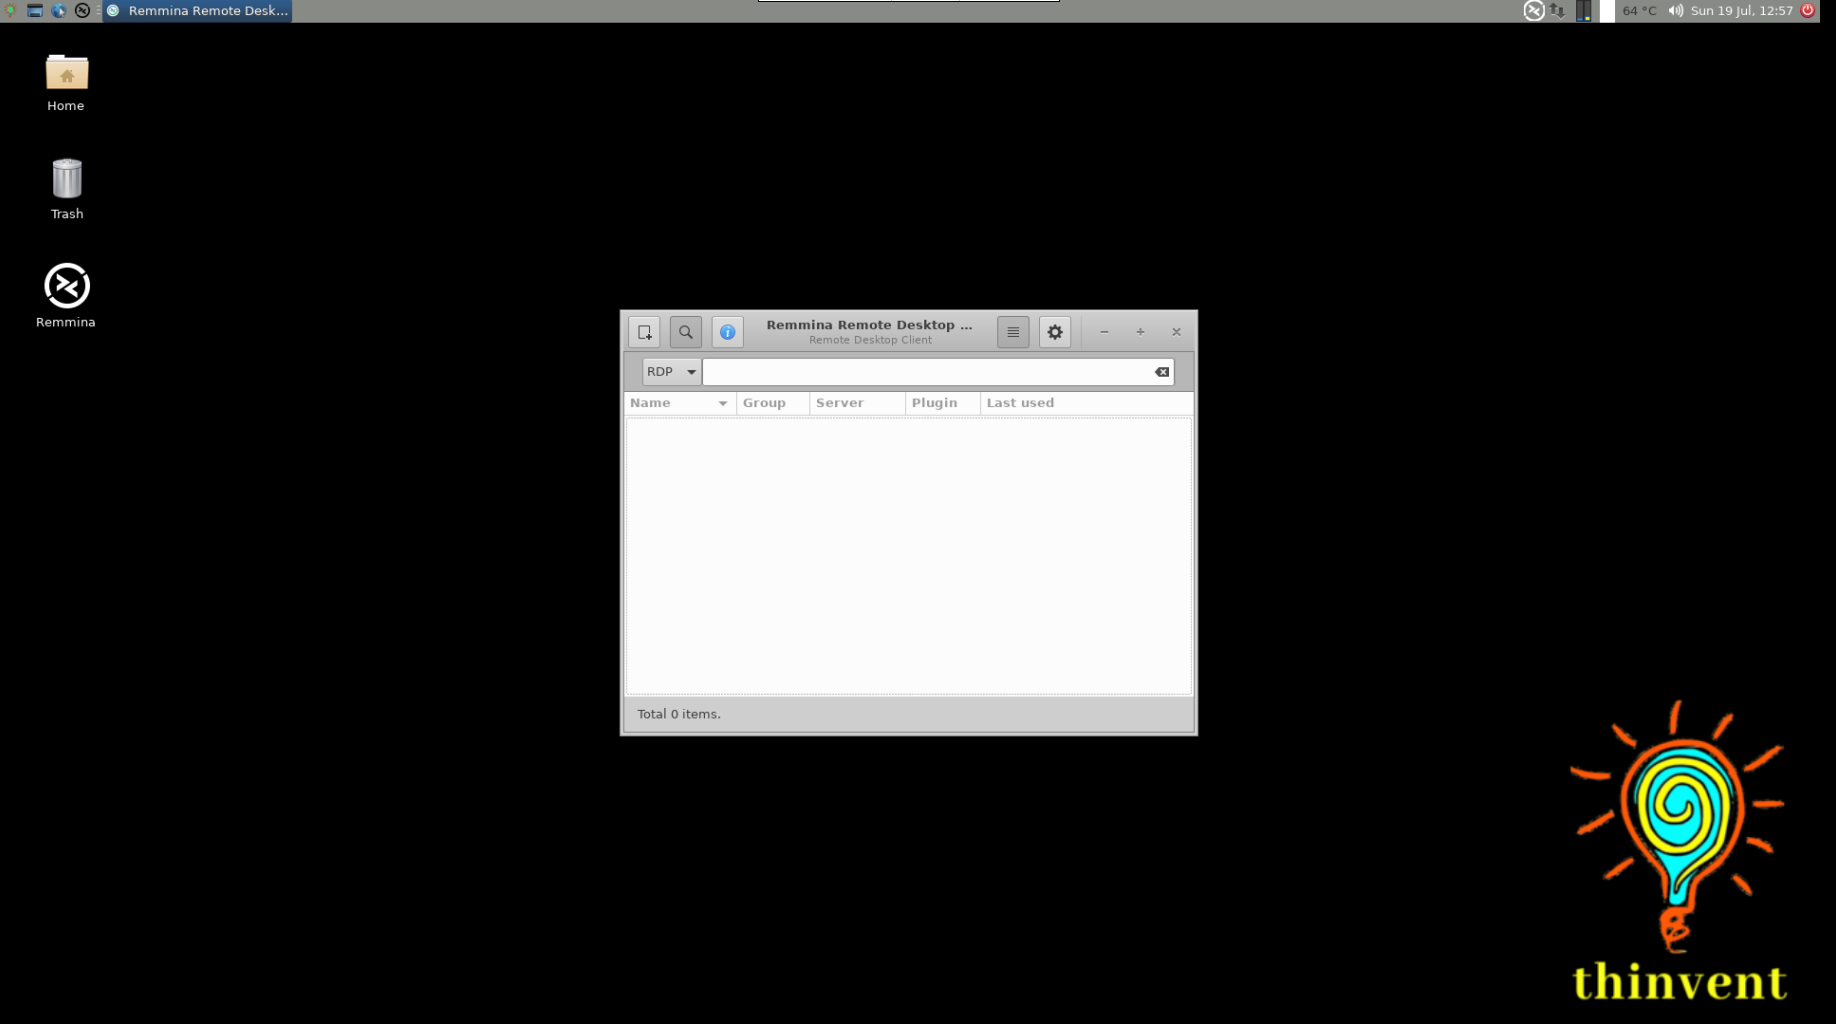
When you first turn on the Micro 4 thin client, you are greeted with the default desktop of the thin client. The desktop has the icons Home, Remmina, and Trash.

- Desktop Icons
 Clicking on the Home thin client’s home directory.
 Clicking on the Remmina will open the Remmmina GUI window where you can make $
 Clicking on the Trash icon will open the recycle bin.
- Using the taskbar
The Taskbar of the thin client is at the top of the screen. It allows you to locate and launch programs through Start and the Start menu, or view any program that is currently open. It also allows you to check the date and time.

Clicking on 1 will open the start menu. Once you click on this, you can navigate through the applications which are provided by the thin client.

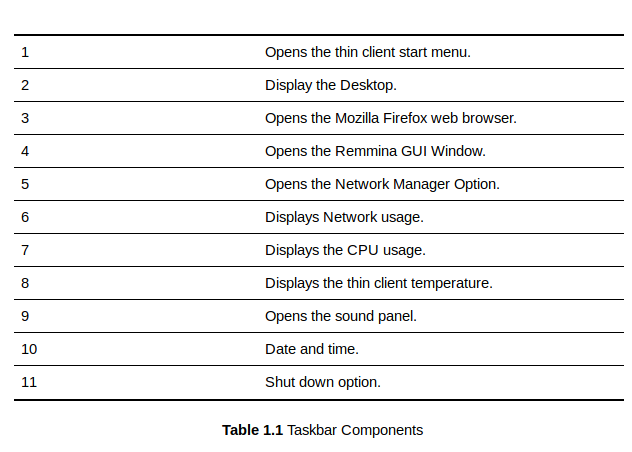
Click on 9 to open the volume panel. From there you can increase or decrease volume.
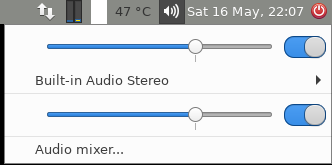
Clicking on the 11th icon will give you the option to shut down the system.
Network Settings
You can access the network configuration window by two methods.
Method 1:
Start menu > All applications > Advanced Network Configuration.
Method 2:
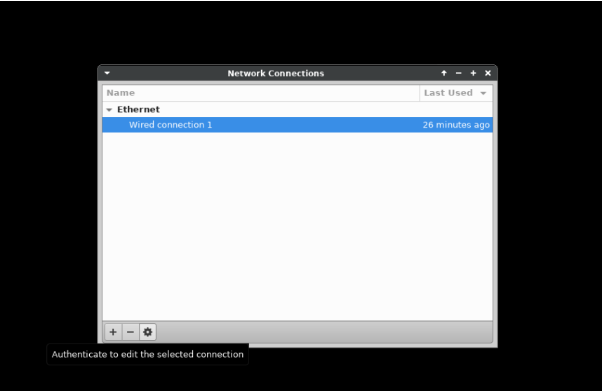
By clicking on the 5th icon of the taskbar.
- Ethernet
By default, the thin client network settings are on the DHCP settings. However, if you want to change it to the static configuration, you can do it from it.
The network settings window will come up once you open the network settings from one of the two methods defined above.
 2.1
2.1
-
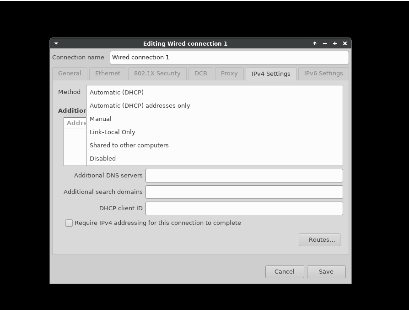
Click on the settings icon as shown in figure 2.1. It will open the editing window. Click on the IP4 Settings tab. Select the connection type from the list, whether you want to select the DHCP or Manual settings.
-
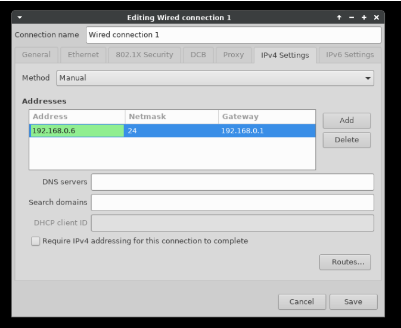
Once the Manual method is selected, you need to click on Add. Now you can enter the desired IP address which you want to assign to your thin client. (Figure 2.2 and 2.3)
-
Once you have entered the IP address, click on Save and close the network setting window.
-
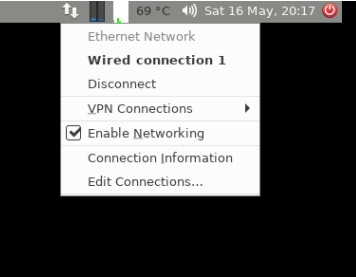
To activate your settings, click on the network icon on the top right of the taskbar. Then, you need to click on the disconnect option and again click on the
Wired connection option. This will activate the new IP settings which you have entered into your system.
- WiFi
-
Connect the WiFi dongle with your thin client.
-
Now, click on the Network Icon which is in the task bar. The moment you will click on it, you will see the available WIFI networks. Just click on the one of the WIFI networks which you want to get connected with, enter the WIFI password and you are connected to WiFi network.
Configuring Printers
There are two ways by which you can configure your printer locally with the thin client.
Method 1: Configuring through the start menu
-
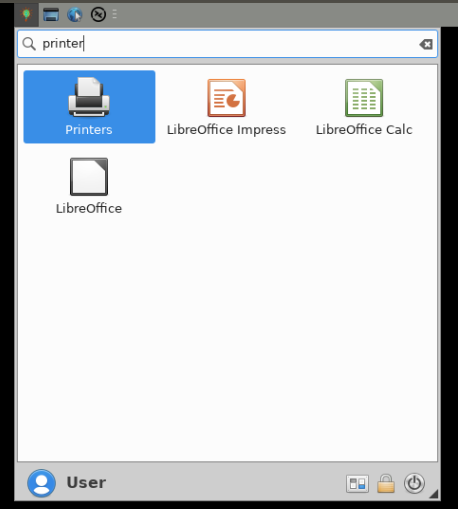
Connect the printer USB cable to the thin client and search for the printers in the start menu.
-
Clicking on Printer will open the printer configuration window
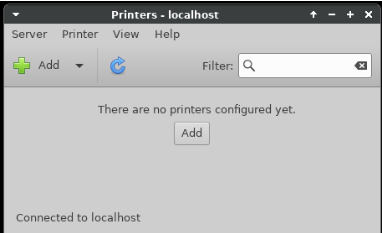
Click on Add to add the printer.
-
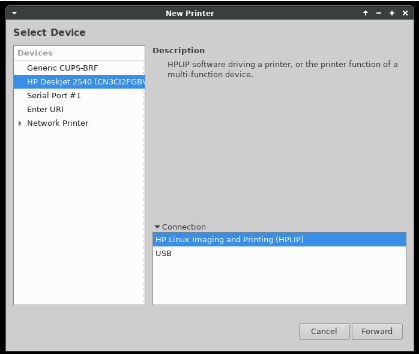
It will show the name of the printer which is successfully detected by the thin client. If your printer name still does not show up in the Select Device section, you need to check your printer USB cable. Select the printer and click on Forward. The system will now search for the printer drivers.
-
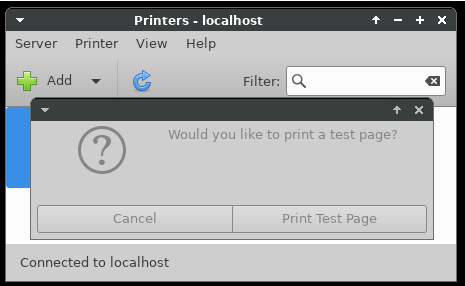
Once the driver is installed, the settings window will give an option to print a test page to check if the connected printer is configured correctly.
-
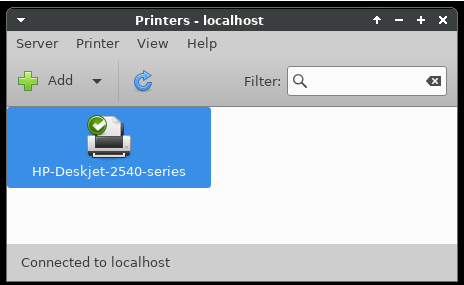
The printer setting window will show the printer configured by the user once the printing of the test page is done.
Method 2: Configuring through the Web Browser
-
Open the Web browser and type localhost:631 in the address bar and press enter.

-
This will open the Cups utility page. Now, click on the Administration tab.
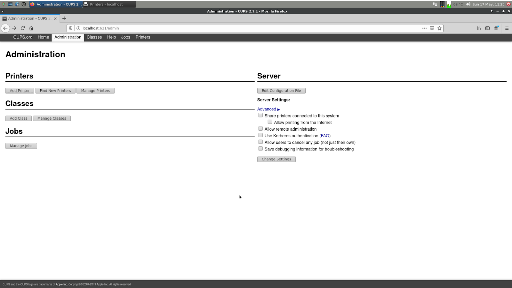
-
The Utility gives you three options, Add printers, Find New Printer and Manage Printer. If you want to manage a pre-installed printer, you need to click on the Manage Printer button. To add a new printer, click on Add Printer.
-
The system will ask for Username and password. Put root as the user name and thinux as password.
-
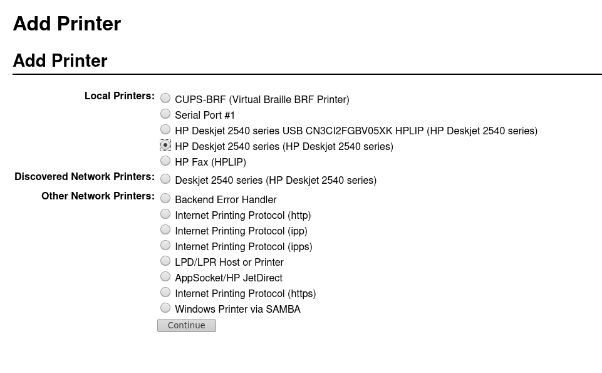
If your printer is connected with the thin client, it will show it’s name in the Add Printer configuration window. Select the printer which you want to add and click on Continue.
-
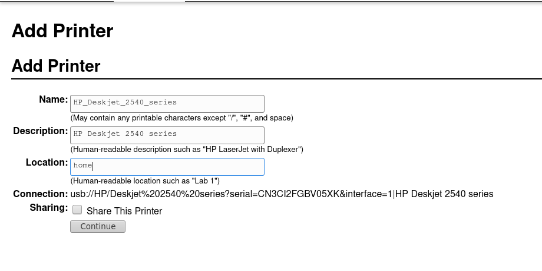
Next, it will ask you whether you want to share the printer or not. Check the button if you want to share the printer and click on continue.
-
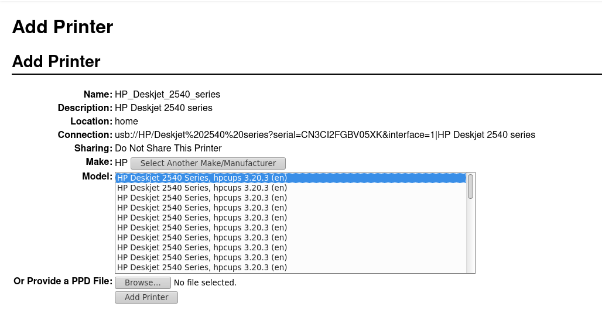
Select the ppd file from the Model section according to your printer. You can also provide a ppd from the external driver or a directory. Click on Add Printer once all is done.
-
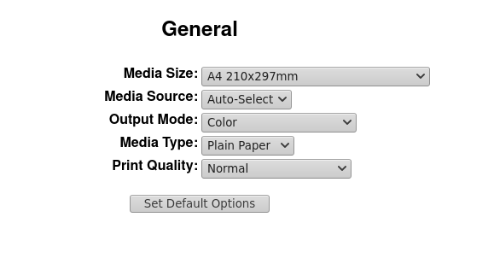
Set the default page settings and other settings. Click on Set Default Options once you are done.
-
Now your printer is configured successfully. You can click on Administration or Maintenance to explore the printer options. You can print a test change to the printer from the Maintenance > Test page.
Managing RDP Preferences
Thinvent has provided two ways by which you can access any operating system remotely from anywhere. These ways are:
- Remmina.
- Kiosk Mode.
1. Remmina
Remmina is a remote desktop client which is widely used in the Linux based operating systems. It supports the Remote Desktop Protocol which is used to connect with a remote system. You can access the Remmina application in the thin client via the main menu or just click on the Remmina icon which is on the taskbar. Once clicked, you will see the main Remmina dialog box where you can make your connection settings.
Although you can connect to a remote system by just mentioning the I.P address of the remote system in the RDP section but, by doing this you won’t be able to explore the features of Remmina. So, it is always preferred to create a new connection with all those options enabled.
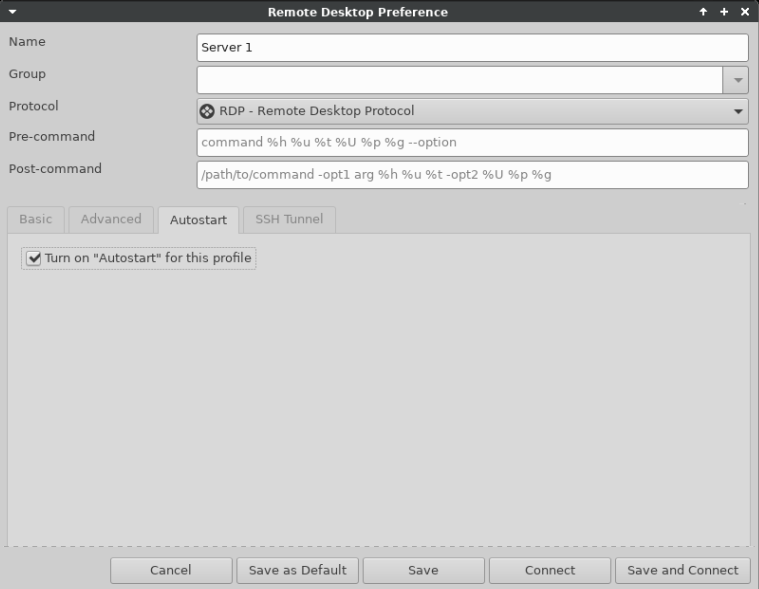
To create a new connection click on the  icon and Remote Desktop Preference window will get opened. By default, the protocol selected in the Protocol section is NX-NX Technology, you need to select the RDP -Remote Desktop Protocol there. Once you are done with it, your Remote Desktop Preference would be like the screenshot below. Each field of the window is described below.
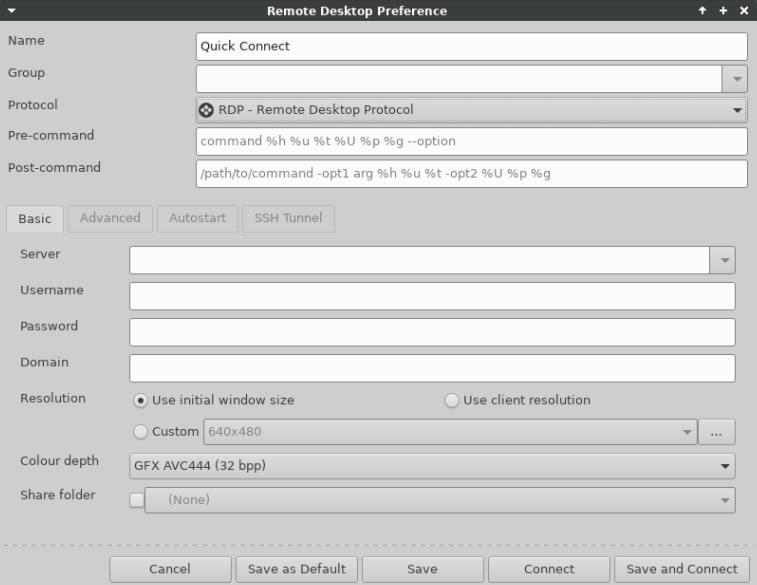
- Name
This is the name of the computer that you wish to connect to, this does not need to be the actual name that has been assigned to the host computer. You can choose any name that would best describe the computer and differentiate it from the others (if you plan on having multiple hosts).
- Group
Leave it as it is , empty. There is no need for it for connecting to a remote system.
- Protocol
- Select the RDP – Remote Desktop Protocol.
- Pre-command and Post-command
- Remmina has ‘Pre’ and ‘Post’ command support to execute a script before it connects and after it disconnects, respectively. You can leave those fields blanks.
- Server
- Enter the IP address of the system to which you want to connect remotely. The IP address could be internal i.e if the system is connected with the local network or a public IP address.
- Username and Password
- Enter the username that you wish to log onto your host computer in the Username field. In the Password field, you need to enter the password of the user to whom you are going to connect.
- Domain
- If your networking has a domain name, then mention its name in this field. Otherwise, leave it blank.
- Resolution
There are 3 options provided in the resolution field. If you choose Use initial window size, the RDP screen would be compact. This option is not recommended so it is better to choose the Use client resolution option. If you want to set a custom resolution then select Custom and select the appropriate resolution from the drop-down list.
- Colour Depth
Select the appropriate colour depth via this option. This is an important selection, if you select the default option of 256 colours (8bpp) and your default background is Hi-Res then you will start to see some funky colours and it is generally unworkable. If you are on a slower connection or if you are connecting to an external machine outside of your network you may need to reduce the number of colours. By default, you can let it set on the predefined settings which is GFX AVC444(32bpp).
- Share Folder
Use this option if you want to copy a file from your thin client to your remote pc or vice-versa. Once you select this box, it will give you an option which folder or path you want to share and the same folder or path will appear in your Windows machine.
Once all these options are filled, your Remote Desktop Preference screen will look like this.

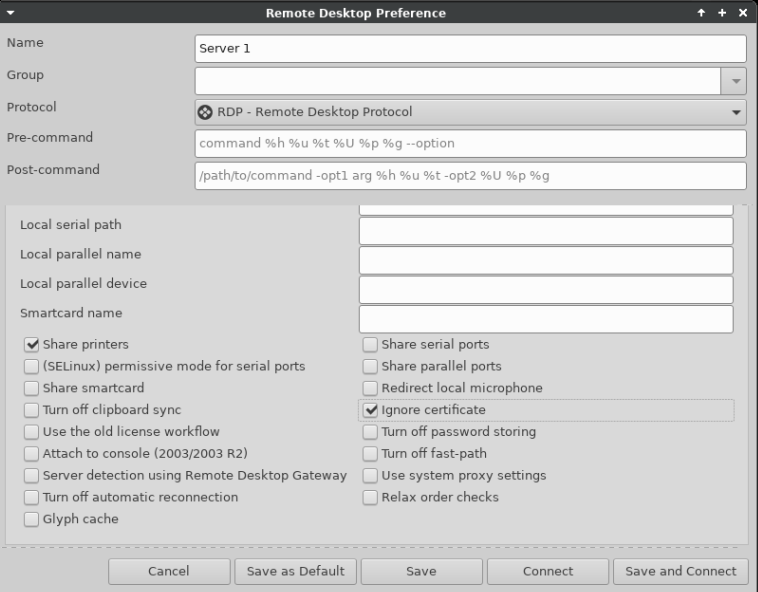
Click on the Advanced tab to enable other features like sound during the RDP connection.

- Quality
This option is related to the quality of the RDP connection. The list provides options like Poor, Medium, Good, Best. If you choose the Best option, your overall RDP connection quality will be good however, you may experience some lag in your connection. So, it is advised to have the Poor option selected in this field.
- Sound
This option enables the sound over the RDP connection. You can choose from options like Local, Local-medium, Local-best etc. here.
- Security
You can choose the level of security like NLA, TLS, RDP from this option otherwise leave this option on Negotiate.
Now, scroll down the window and select options like share local printer etc. according to your needs.
If you want to get connected to your created connection automatically once you open the Remmina, you need to check the Turn on “Auto Start” for this profile. Option in the Autostart tab.
Click on the Save button once you are done with the settings options. Once it is done, you will see a connection is connected with the name provided by you in the main Remmina window.
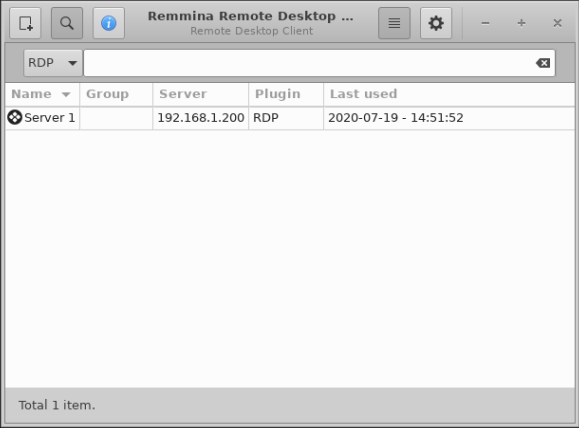
You just need to double click on the connection which has been created and you will be connected to the host system whose access you want to have.
2. Kiosk Mode
Kiosk mode is a feature that only allows you to run one application and that is Remmina. Other features of the Thinux operating system like the GUI and other things get disabled and you will see the Remmina window only on your screen.
-
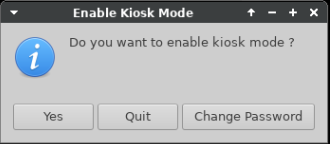
Click on the Enable Kiosk Mode icon in the Thinux menu to enable the Kiosk mode in your thin client.
Note: Before accessing the Kiosk mode, you need to create the RDP connection in the Remmina first because one system enters into Kiosk mode, it doesn’t allow you to create new connections or make changes to the existing connection.
-
Once you click on the icon, a dialog box will appear asking you to enable the Kiosk mode. It gives you the option to enable the mode(yes), quit the mode in case you have accidentally clicked on the Kiosk mode icon and change password.
-
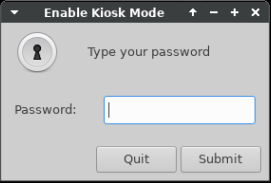
If you click on yes, the system will ask for the password to enable the Kiosk mode.
-
The system will go into the Kiosk mode if you enter the correct password, otherwise it will show that the password you entered is wrong.
-
Once you enter the Kiosk mode, you will see the only window which is the Remmina window and it will have the created RDP connection which you have created before enabling the kiosk mode.

:
-
If you haven’t selected the auto connect option, the system will not auto connect to the remote system. If it is checked, then the system will automatically connect to the remote system once you enable the kiosk mode.
-
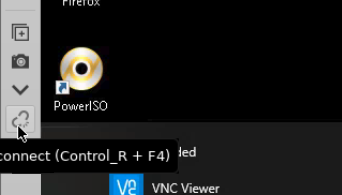
To disable the kiosk mode, click on the
 button on the Remmina window. It will open a dialog box where you would be asked to either shut down the system or configuration. Click on the configuration tab and it will ask for the kiosk mode password. Entering the password successfully will disable the Kiosk mode and it will take you back to the Thinux operating system GUI.

-
If you wish to enable the Kiosk mode forever then you can just shut down and the next time the system boots, it will automatically connect to the remote system.

Change Kiosk Password
You can change the default kiosk password by clicking on the Change Password.
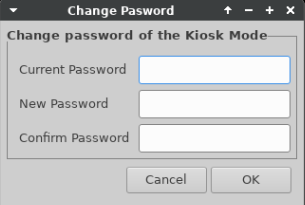
-
The window will ask you for the current password, new password. To make changes it again asks you to confirm the new password which you have entered in the New password field. If any mismatch happens, like your entered current password and current password doesn’t match or your new and confirm password doesn’t match, the system will throw an error. If everything matches then a password update message will appear on the window.

Disconnect RDP From Server
There are two methods by which you can disconnect the RDP connection from a server.
- Method 1:
Click on the shutdown button which is in the start menu of the Windows. You will see the Disconnect option. Click on it and your RDP connection will be disconnected.

- Method 2:
Remmina has the disconnect option. You just need to click on the option and the RDP will be disconnected.
Factory Reset
If the thin client is not functioning properly or some of the operating system features are not working, in such a case you can try factory resetting the system. Doing a factory reset restores the system back to its original state when it was delivered to the customer.
To perform the factory reset, go the main menu and search for the factory reset icon.
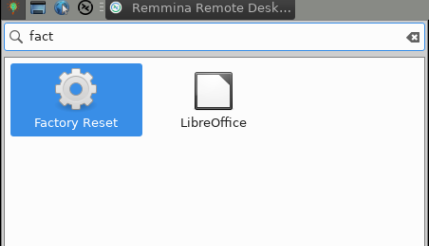
Clicking on that icon will ask you to reboot the system. Click on yes. Once reboot is done, your system will be restored to factory version.
Related products
-

IPC 3
-
IPC 5
-
Sale!
Byte 1 Mini PC
₹12,349.00 – ₹20,699.00 Select options This product has multiple variants. The options may be chosen on the product page