QEMU is an open-source machine emulator or virtualizer which is capable to run operating systems of any architecture. To set up the QEMU environment in a base OS like Ubuntu or CentOS is pretty straightforward.
Prerequsites
Install the QEMU and other supporting packages to enable the QEMU in the Ubuntu 18.04 system.
sudo apt-get update
sudo apt-get install -y qemu-kvm qemu virt-manager virt-viewer libvirt-binYou can also download QEMU from the offcial site. To download and build QEMU 5.0.0:
wget https://download.qemu.org/qemu-5.0.0.tar.xz
tar xvJf qemu-5.0.0.tar.xz
cd qemu-5.0.0
./configure
make
To download and build QEMU from git:
git clone https://git.qemu.org/git/qemu.git
cd qemu
git submodule init
git submodule update --recursive
./configure
make
Set up bridge networking in the system. A bridged network is a dedicated network card to a virtual machine that helps guest machines to connect outside the network, and this must be set up before creating a virtual machine using QEMU.
sudo apt-get install -y bridge-utils resolvconf
Edit interface file to create a bridge br1. You can also assign the static IP to your bridge.
sudo nano /etc/network/interfaces
# interfaces(5) file used by ifup(8) and ifdown(8)
auto lo
iface lo inet loopback
#Bridge Name #
auto br1
# Bridge Information #
iface br1 inet static
bridge_ports ens33
bridge_stp off
bridge_fd 9
# Bridge IP #
address 192.168.1.10
netmask 255.255.255.0
network 192.168.1.0
broadcast 192.168.1.255
gateway 192.168.1.1
dns-nameservers 192.168.1.1
dns-nameservers 8.8.8.8
Download the CentOS ARM image
Download or import the ARM image. Here we are using the CentOS ARM image. You can download it from the CentOS page or wget/curl it from the CEntOS FTP server. You can download the image directly from the link below.
Or you can wget the image from the command line.
wget http://centos.zero.com.ar/centos-altarch/7.8.2003/isos/armhfp/CentOS-Userland-7-armv7hl-generic-Minimal-2003-sda.raw.xz
Running the QEMU
QEMU would require Kernel and initramfs file for booting the image. You can extract these files by mounting the image using the kpartx and mount command.
Using kpartx:
sudo kpartx -av (path_of_your_image)
Running the above command will create the loop devices in your system. You can mount the particular loop device to mnt using the mount command and copy the required files from the image.
sudo mount /dev/mapper/loop21p2 /mnt/
Once you are done with your changes, you need to umount the mnt and delete the loops.
sudo umount /mnt/
sudo kpart -dv (path_of_the_image)
Using mount command:
Use parted command to get the start and end sector of the partitions in the image.
sudo parted (path_of_the_image)
Running the above command will open the parted utility. Type Unitand press enter. Enter the option b. Once it is done, type print and you will get the required information.
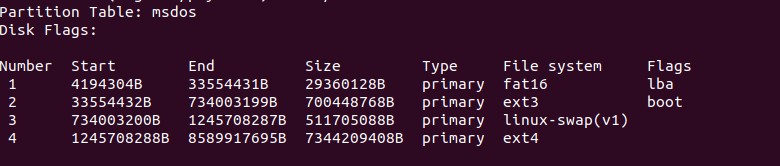
Use this information to mount the required partition to the mnt. Here I am mounting the first partition to the mnt.
sudo mount -o loop,offset=4194304 (image_path) /mnt/
Since we have extracted the required files from the image, you can now use the QEMU command to run the VM environment.
qemu-system-arm \
-M cubieboard -m 2048 -cpu arm1176 -dtb sun4i-a10-cubieboard.dtb \
-kernel vmlinuz-4.19.113-300.el7.armv7hl \
-append "ro root=UUID=64e0ba9f-b645-4ce1-925d-e1a723a580fd rhgb quiet LANG=en_US.UTF-8" \
-initrd initramfs-4.19.113-300.el7.armv7hl.img -nographic \
-drive file=(Image_file_path),format=raw,if=none,id=d1 \
-device ide-hd,drive=d1 -net user,hostfwd=tcp::10022-:22 -net nic
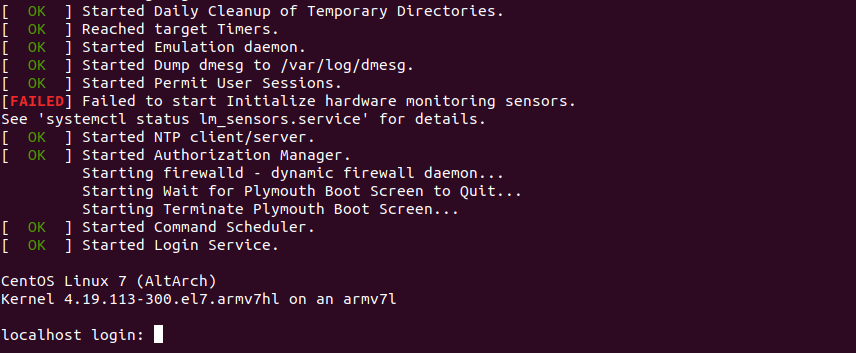
Here I have provided 2GB RAM to the VM and provided the other pieces of information which are required to boot the image like kernel, initrd etc.
Once the image is successfully booted, you will get the login screen at your terminal.
By default, the size of the root file system partition is limited to 2 GB. The size of the partition can be increased by the following command.
[root@host ~]# /usr/bin/rootfs-expand