Steps to configure Dynamic IP:
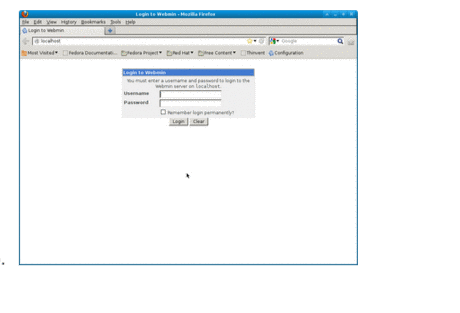
1. Open Firefox or Chrome web browser .
2. Type localhost or 127.0.0.1 in url field in Browser.
3. Enter your Webmin Login name = root and password=thinux in the Webmin server login dialog box.
4. Click on Networking in the left pane of Webmin. Click on Network Configuration
to list the network interface present .
5. Click on the name of the network interface you want to edit .If you are wireless network click on the wlan0 option .
7. Once the interface is recognized, the steps to configure it are
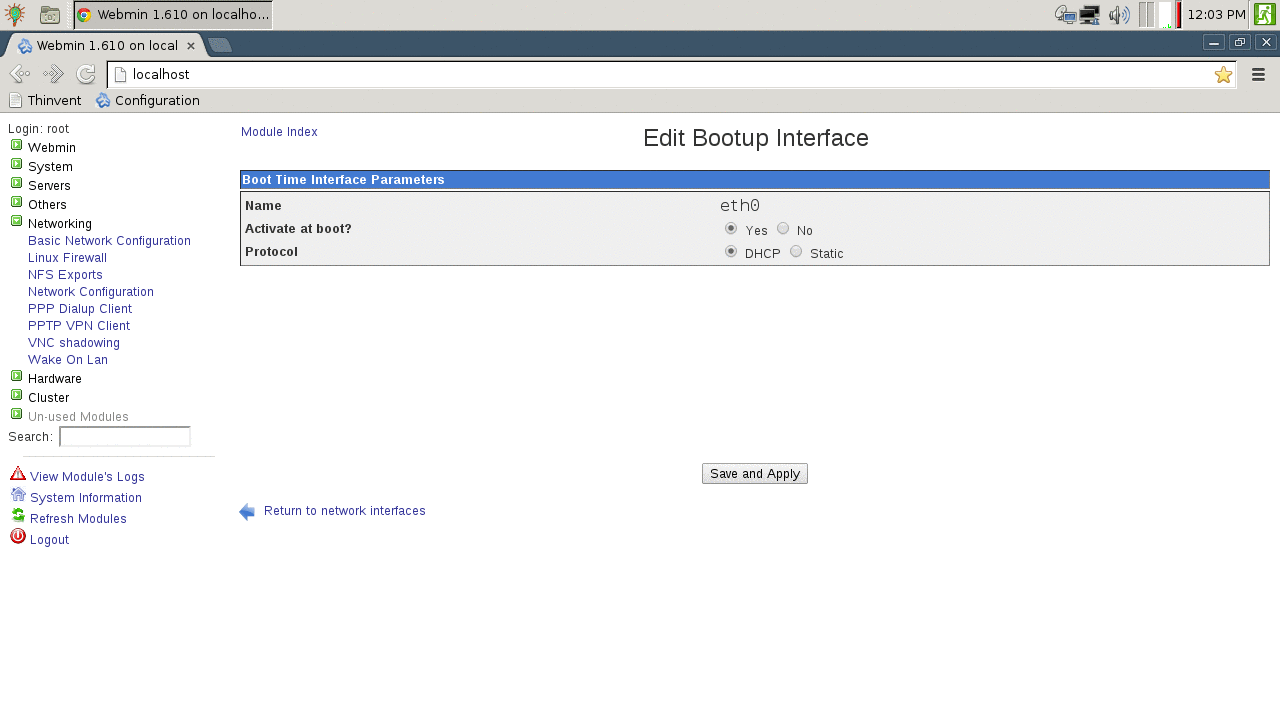
8. If you want the interface to be brought up at boot time, set the Activate at boot? field to Yes.
9. In the protocol field select DHCP .
10 . In the IP Address field, either enter an address or select the From DHCP option for it to be dynamically assigned.
11. Enter the netmask for the network the interface is on into the Netmask field, such as 255.255.255.0 .
12. In the Primary Name Server field enter the address of Primary Name Server
such 4.2.2.2 .
13. In the Secondary Name Server field enter the address of Secondary Name
Server such as 8.8.8.8
14. In the. default domain field add the default domain .
15. Press Save and Apply .
Wait a few seconds for the network interface to restart with new IP address.